July 23, 2013

Spicy Green Bean Zucchini

My hubby and I are trying to eat healthier. We've been camping a lot lately and have had a few too many s'mores, chips, and hot dogs. So today I developed this veggie dish that was so delicious.


Ingredients:
Half of a medium zucchini, in 1 inch chunks
1 handful of fresh green beans, cut into 1 inch strips
2 Tbsp Olive Oil
1/2 Onion, diced
6 pieces of diced jalapenos
1 tsp crushed red pepper
1 tsp fresh basil
salt
pepper
1/4 c. shredded cheese

1. Heat oil in a pan over med-high heat.
2. Toss in the zucchini, green beans, and onion.
3. Saute veggies for 5-10 min.
5. While veggies are sauteing, add jalapenos, crushed red pepper, basil, salt, and pepper.
6. After the zucchini is tender, remove the pan from the heat. I thought the dish was too spicy, so I would recommend taking out the jalapenos - the flavor will still be in the dish.
7. Sprinkle with shredded cheese and let it melt.

Enjoy!

July 22, 2013

19 Pounds of Strawberries

Mmmmmm, it's strawberry picking time!


It was the first time my husband and I went strawberry picking. I had no idea how many to pick. I thought four containers would be perfect....and 19 pounds of strawberries later, I wondered what I had gotten myself into!

You might be laughing to yourself thinking, "That's a lot of berries!" (and work!). But this is what I did:

1. Strawberry Jam
2. Strawberry Ice Cream Topping
3. Chocolate Covered Strawberries
4. Frozen Strawberries for Smoothies
5. Fresh

Keep reading to see how I was able to whittle those strawberries down to only 6 cups to eat fresh...

Strawberry Jam Yield: 4 Half Pint Jars

Step 1: Get those jars, lids, and rings sterilized! Boil in water for 10 minutes.

Step 2: Find a recipe to use for your strawberry jam. 
I used the recipe from the Ball RealFruit Classic Pectin container. 
Measure out your strawberries into a small layer.
Step 3: Smash the strawberries with a potato masher or pastry cutter (like me).
Then add more strawberries (for 4 half-pint jars I needed 2 2/3 c. of mashed berries).
Step 4: You want the berries to be quite mashed, but still chunky so you can tell what you're eating.

Step 5: I measured out 2 cups of white sugar, 3 Tbsp Ball RealFruit Classic Pectin,
 with my 2 2/3c. strawberries.

Step 6: Before I started cooking the jam, I set out the jars, lids and rings.

Step 7: Pour the strawberries and fruit pectin into a saucepan over med-high heat. Stir occasionally.
You are going to want the mixture to come to a full rolling boil that cannot be calmed down when you stir it.
Step 8: Once it starts to boil, add the sugar and stir constantly. You want the mixture to return to the rolling boil. Boil hard for 1 minute.
Step 9: Remove from the heat and begin ladling the jelly into the jars you have prepared.


Step 10: Wipe off the rim of the jars with a wet rag or paper towel so the lids will seal tightly. Place the lids and rings on the jars - only tighten with your fingertips, not your whole palm (that will make the lid too tight).
You will place the closed jars in a canner and process for 10-15 minutes, depending on your canner. 


Once the jars have processed, take them out and set them on the counter. You may hear them pop and seal right away, but some may take 24 hours to seal. Just let them sit, don't mess with them - it could take 2 weeks for the jam to set! Mine set almost right after they cooled.

The next day I made 5 more (half-pint) jars of strawberry jam.

Next I made some Chocolate Covered Strawberries:

I melted 1/2 bag of semi-sweet chocolate chips over low heat in a saucepan on the stove. I picked strawberries that were firm and used a toothpick to poke them and dip them in the melted chocolate. I then placed them on a wax paper covered plate. I placed them in the refrigerator to harden. Yum.

Third, I made Strawberry Topping - I found it on Brown Eyed Baker's blog. I decided to can this strawberry topping recipe into three pint jars - so I had to triple the recipe. It smelled amazing! I can't wait to put it over vanilla ice cream.


Lastly I Flash Froze strawberries for smoothies. A very common mistake that people make when freezing fruit is they put fresh fruit in a freezer bag and throw it in the freezer. Bad idea. All the fruit will stick together. Flash Freezing is the method that allows each individual piece of fruit to coat itself with frost, preventing them from sticking together when you put them in a freezer bag. 

Flash Freezing:
Lay berries out on a cookie sheet in a single layer - try to keep them from touching (this will make it easier in getting them off the cookie sheet). Place a piece of wax paper (same size as cookie sheet) over the berries on the pan. Place another layer of berries on top of the wax paper. This creates two-layers of fruit on one pan to freeze more berries quickly. Place the pan in the freezer for an hour or two, until you feel a coating of ice on the berries. Once they have an ice coating, pull the berries off the top layer of wax paper and pull them off the pan on the bottom layer. Pour them into a freezer bag and pop the bag into the freezer. Boom. You have strawberries for smoothies - and they won't be sticking together.


After all these strawberries were processed how I wanted them, I still had 6 cups left for fresh eating.
After all, I believe 19 Lbs of strawberries was perfect!


July 18, 2013

Coffee Table Turned Ottoman

Last year when my husband and I moved, we went to Ikea and bought a bunch of furniture for our new apartment. Overtime I've noticed that the tops of our coffee table and other dressers are getting some scratches. We considered buying those glass tops to cover them. But then I had an idea - how about we turn our coffee table into an ottoman! We put our feet on it all the time anyways, but that sharp edge always digs into the back of our calves. A comfy ottoman would be awesome! I figured there had to be blogs online of how to do it - I couldn't possibly have been the first genius to think of this. I decided to Google search this: "how to turn Ikea coffee table into ottoman" - and boom, I found the perfect blog with picture directions!


So without further ado, here is how we did it. Yes, my hubby decided to help me, but I will not let him take credit for the idea to do this to our coffee table - that was all me. ;)

1. I went to JoAnn Fabrics (they are having a HUGE coupon promotion right now) and bought these items:
  • Richloom Studio-Presidio Water Fabric: 2 Yards
    • Originally 29.99 per yard, but on sale: $17.99/yd
    • I decided to splurge on the fabric because A) It matches our living room theme/color exactly  B) We were upholstering a huge item in the living room for all to see C) I wanted it to last since we will always be putting our feet up on it.
  • Heavy Duty Staple Gun & Staples:
    • Staple Gun: $10.50 (50% off coupon)
    • Staples: $2.30 (50% off coupon)
  • Low-Loft Batting (This is where I stood in the store the longest, very unsure of which "loft" to get for this project.
    • Batting: On Sale for $7.49
  • 2" High Density Foam (2 squares)
    • Foam: On Sale $6.99 each
  • Other supplies: Utility Knife, Duct Tape, Scissors
Richloom Studio-Presidio Water Fabric


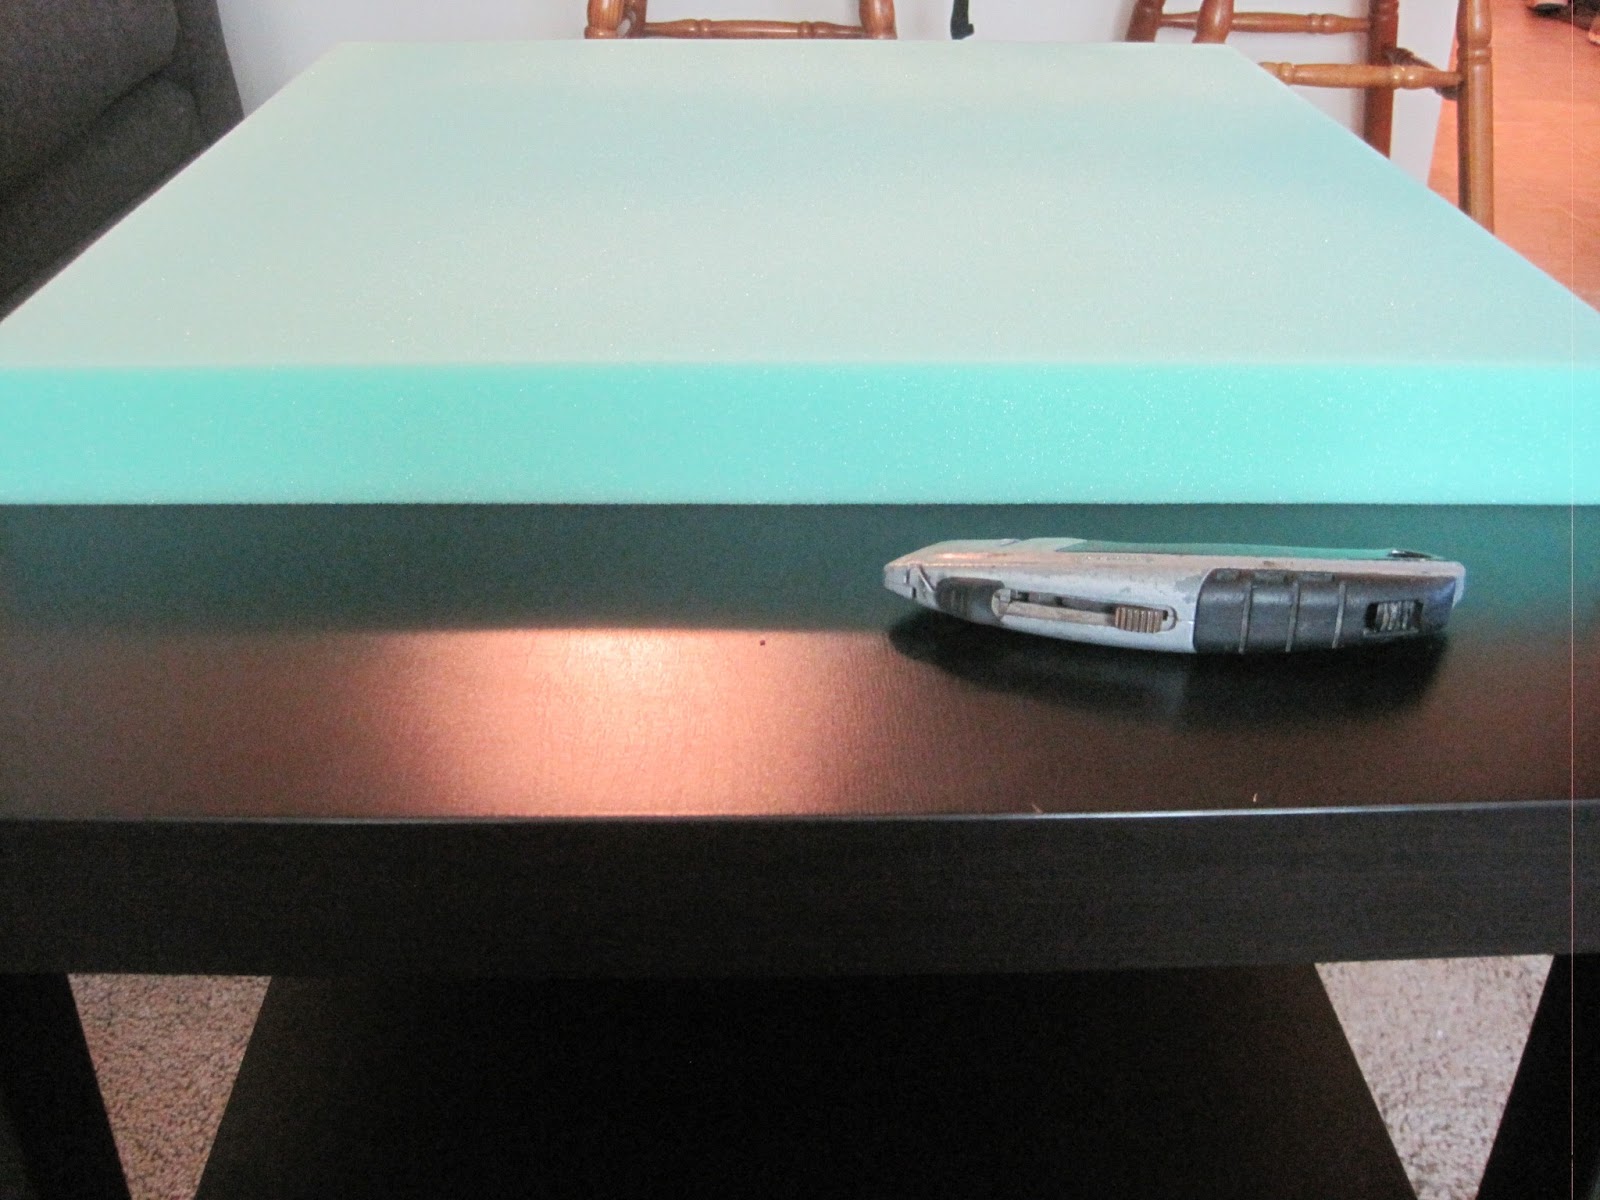
2. First, my husband measured and cut the foam with a utility knife to fit the table. I read somewhere online that spray adhesive doesn't work very well to get the foam to stick to the table. We used a few pieces of handy duct tape - and it worked great! It kept the foam from sliding as we put the batting on.


3. Next we laid the batting out on the floor - I had enough to fold it in half for a little extra loft on the ottoman. We flipped the table upside down onto the batting. At this point we realized we had to take the legs off the table - so we did. After the legs were off, we used the staple gun to staple the batting around the table, pulling it tight. There was quite a bit of extra batting on the underside of the table, so we used scissors to cut some off. Next we poked/cut holes in the batting so we could see where the legs would go for later on.


We were almost done stapling the batting on the table and we got a jam in the staple gun! A bad one! It took my husband over an hour to get the staples out of the staple gun. This was not a quick fix -he had to take the whole thing apart! We were finally able to proceed after his wonderful effort to fix it.

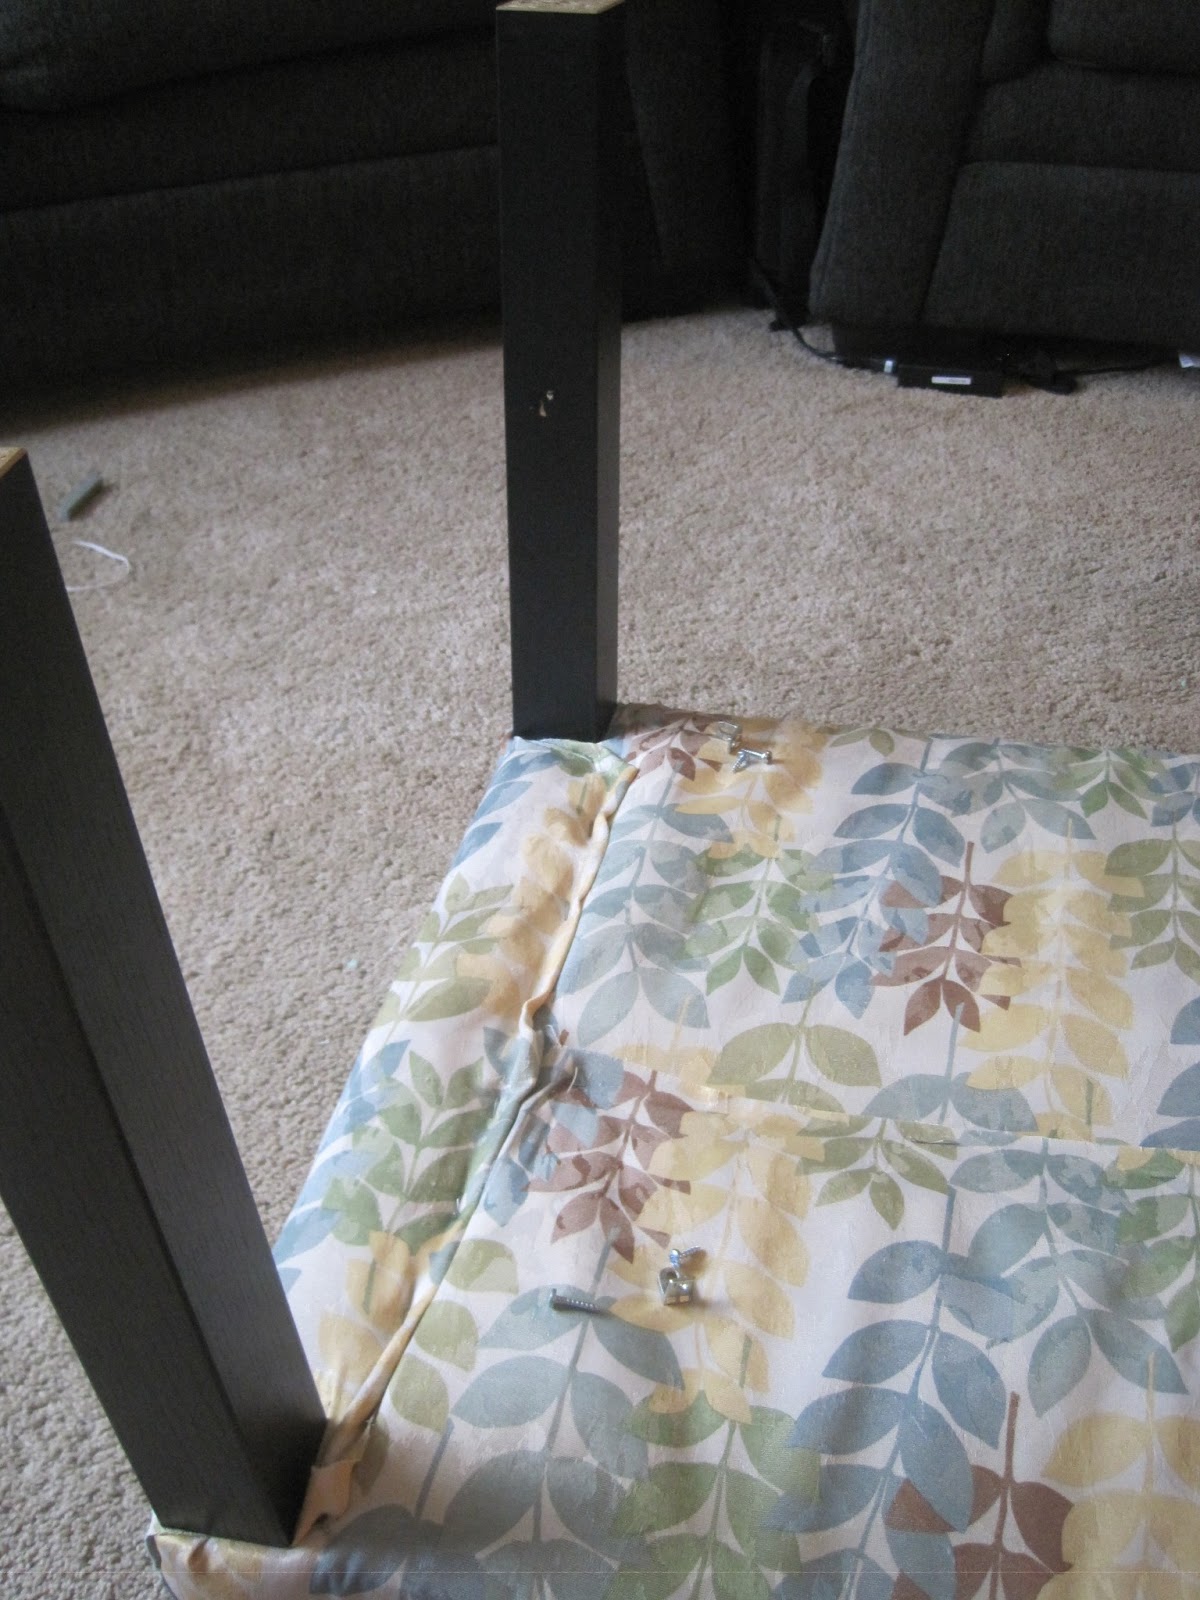
4. After the batting was securely fastened, we laid the ironed fabric on the floor. We used the staple gun to securely fasten it to the underside of the table as well - doing our best to make "clean corners" (I need to look more into this on our next project). I got really excited as the finished product started coming together. Next my husband cut holes in the fabric so we could screw the table legs back in - and as he did, the knife slipped and he cut his finger! (not "Emergency Room" bad)

After we bandaged his finger up, we screwed the legs back into the table (above).

And here it is - our first upholstery project ever!

Our next project is to cut the legs down a few inches for a
more comfortable level. But for now, it's just fine.

April 1, 2013

Crochet Collection

I learned how to crochet in November 2012. This post has a sample of some projects I have done since then. As time goes on, I will begin to share the patterns that I use. Stay Tuned! (many of these have been gifts, so some may look familiar :)). 


Both booty sets (Pink/Yellow Set and Grey/Yellow Set) are inspired by several different patterns.
Pink Hat is designed by Kate Alvis on Ravelry.com
The pink and gray booties are from Lion Brand's website, here.
The Big Flowers on the hats are from this website.


 I really wanted to make an infinity scarf. I found the pattern for the cowl on the right from this blog. I found it to be really tight, so I made one twice as long, with the same beautiful (back loop) half double crochet stitch (on the left). It is much more comfortable. I used Lion Brand Hometown USA super bulky yarn in Grand Rapids green. For the cowl on the right I used Lion Brand Wool Ease Chunky in Wheat (a little scratchy). 


This is a hat with a brim pattern that I found on Red Heart's website. I wouldn't wear it in public, but it was a fun project, and fun to wear around home.


Above and below are some of my very first crochet projects. It is fun to look back and see how far I have come since I learned in November 2012.
Left: Double Crochet hat with pom pom. Top Right: Hat and Gloves (Lion Brand Pattern) set for my sister. Bottom Right: Chunky Scarf for my sister-in-law.

February 1, 2013

Hearty Breakfast Smoothie

In a Blender combine:

1 Cup Skim Milk
1/2 cup Lowfat Strawberry Yogurt
1/3 cup fresh pineapple
1/4 cup quick oats
3 ice cubes

293 Calories

January 1, 2013

Mini Veggie-Chicken Pot Pies

I just finished eating these for dinner, and I couldn't wait to put the recipe on here. This recipe is adapted from several different recipes I've found, and these are delish.

1 1/2 Chicken Breasts

1/2 bag of mixed frozen veggies
1/2 can cream of chicken soup
1 1/2 cups of pancake mix ("Just Add Water" kind)
1 1/2 cups of water
2 TBL Olive oil
Shredded Cheese
Rosemary
Parsley
Salt, Pepper
Seasoned Salt

1. Preheat oven to 350, and spray 12 cup muffin tin.

2. Season raw chicken breasts with salt, pepper, and seasoned salt. Bake in oven on 350 degrees for 1 hour.
3. Shred the cooked chicken breast. Put chicken in a skillet with 2 TBL olive oil, the frozen mixed veggies, a dash of water, and the cream of chicken soup. Heat on med-hi until veggies are cooked through.
4. In a small bowl, mix pancake mix with water, stir. Add in parsley and rosemary to season.
5. Pour a spoonful of batter into each cup (2 or 3 TBL). Pour 1/4 cup of chicken/veggie mix into each cup. 6. Pour another large spoonful of batter over each cup in the pan. Sprinkle with cheese.
7. Bake on 350 for 25 min.


Adapted from:

http://www.bettycrocker.com/Tips/TipsLibrary/Cooking-Tips/Create-Your-Own-Signature-Mini-Pie and 
Aunt Jemima Buttermilk Pancake Complete Mix Box Pot Pie recipe

December 1, 2012

Skinny-Mini Pizzas

I Love Pizza. So I try to find different ways to make it and ways to make it a little healthier. These mini pizzas run around 143 calories each (maybe a little more).

Ingredients:


2 - 2 1/2 cups bread flour or all purpose flour

2 1/4 tsp. dry active yeast
1 TBL honey
3 TBL Olive Oil
1 Tsp. Salt
1 cup luke warm water
Spaghetti Sauce
Shredded Mozzarella Cheese
Hormel Turkey Pepperoni Minis

Stir warm water, yeast & honey together in a bowl. Let it sit 10 minutes. Next, add olive oil, salt and slowly add in 2 to 2 1/2 cups of flour. Stir and add flour a little at a time until the dough is not too sticky, but not too dry. Put the dough ball on a floured surface and knead it until it feels like it is going to stick to your fingers, but it doesn't. Roll out the dough and use a floured drinking glass to cut out 8 mini crusts. Place mini crusts on greased pizza pan. Top each mini pizza with spaghetti sauce, a sprinkle of mozzarella cheese and mini turkey pepperonis. Baking times vary so keep an eye on them, but I did: 400 degrees for 15 minutes. Enjoy!


November 1, 2012

Freezer Meals: 2 Hours, 4 Dinners

I've been quite inspired lately by many Pinterest posts of these wonder women setting aside an entire day to make 30+ freezer meals. I don't have the time, energy, or freezer space to do that, but I wanted to try it on a small scale. 

I went to Walmart and bought a huge pack of fresh chicken breasts - I had no plan for the chicken, but knew I could think of some meals with ingredients I already had in my cupboards. This is what I did:

I baked all 8 chicken breasts split between two cake pans. I seasoned them with salt, pepper, and seasoned salt, baked them on 375 for 1 hour. I took them out, shredded them (ended up with about 8 cups of chicken) , and let the pile of chicken cool while I chose my recipes.

 Here are the recipes I made:

Chicken Enchilada Filling (thank you Julia for this recipe!)

  • 2 cups Shredded Chicken
  • 1 can Cream of Chicken
  • 1 4 oz. can of Diced Green Chiles
  • 1 cup. light sour cream
  • 1.5 cups shredded cheese
  • 1/2 tsp. salt
  • Dash of cayenne pepper
    • To Serve: place thawed mixture in whole wheat tortillas, roll up, sprinkle with cheese and bake at 350 for 20-30 minutes.

White Bean Chicken Chili 
  • 2 cups shredded chicken
  • 2 cups corn
  • 1 can white beans
  • 1.5 cups chicken broth
  • 1/2 packet of enchilada seasoning
  • 1/2 orange bell pepper
  • 1/2 tsp. oregano
  • 2 tsp. garlic
  • 2 tbl. olive oil
  • 1 onion
  • Salt and pepper to taste

BBQ Chicken Sandwich Filling
  • 2 cups shredded chicken
  • 1/2 small bottle BBQ sauce
  • 1 tsp. Garlic
  • 1/8 c. vinegar
  • 1 tsp. red pepper flakes
  • 1/4 c. brown sugar
    • Serve BBQ Chicken hot on Whole Wheat Buns

Chicken Pot Pie Filling
  • 2 Cups shredded chicken
  • 2 cups of steamed veggies
  • 1 can cream of chicken
  • 1/2 c. milk
  • Seasoned salt, pepper
    • To make the pot pie crust: Combine 1 C. Whole Wheat Flour, 1/3 C. Butter (Softened), and 1 tsp of salt in a bowl. Use a pastry cutter to combine the ingredients until the butter has made its way throughout the mixture. Next add 5 TBL of cold water. Use a fork to "wisk" it. The dough will begin to pull away from the sides of the bowl. Add one or more tablespoons of  cold water if the mixture is still too dry. Pack the dough into a ball and roll out on a floured surface.Place pie crust in lightly greased pie pan. Dump in the pot pie mixture. If you choose, you can make another crust for the top, or even a crumble topping. Bake 400 degrees for 40-50 minutes.

I put each recipe (cooled) into a freezer bag, labeled with the contents, and baking directions. I'm really looking forward to 4 nights where we can simply heat dinner up and eat it. I hope this inspires you to do the same and save some stress during the week!

October 1, 2012

Spicy Tortilla Soup for Two

I love soup. Ask anyone who knows me well. When my grandma was visiting this past weekend she gave me a fabulous idea to make Chicken Tortilla Soup with a McCormick Enchilada Sauce packet for great flavor. She actually had one with her and gave it to me. I had no recipe to follow, so I decided to experiment on my own with her inspiration. I didn't use chicken in my soup because I was in a hurry and didn't have time to get some out of the freezer, but I ended up getting a really great tasting soup!


The following recipe only makes about 2 servings of soup since it was just for my lunch today.

Ingredients:

2 1/2 Cups warm water
2 Chicken Bullion Cubes
1 Packet of McCormick Enchilada Sauce mix - you will only use half
1 tsp. salt
2 tsp. black pepper
1 tsp. fresh garlic (I use the kind in the jar)
Minced Onion
1/2 cup black beans
3/4 cup whole kernel corn
1/2 cup medium salsa (I used homemade that has green peppers and onions in it)
2 TBL cold water
1 TBL cornstarch
Tortilla Chips, semi broken up


1. In a medium sized pan, put the water, chicken bullion cubes, and 1/2 the packet of enchilada mix over a medium-hi heat. As it warms, the cubes will dissolve. Stir occasionally. 


2. Just before the liquid starts to boil, add the salt, pepper, garlic, and several shakes (maybe a few teaspoons) of minced onion.


3. Continue to stir. Once the liquid starts to boil, add the black beans, corn, and salsa. 


4. Turn it down a little so its not boiling too rapidly. To thicken the soup: Go get two tablespoons of cold water in a bowl. Add 1 TBL of cornstarch and stir it into the cold water. Pour this into the soup in the pan. Stir constantly and return the soup to a boil. Boil for one minute, still stirring, then reduce heat to simmer until the soup is heated through.

5. Serve yourself some soup and throw some semi-broken tortilla chips onto the top of your soup and give a little stir. 


You are done! Now you can enjoy your spicy soup!